
Getting Started with KDCompute
About KDCompute
The KDCompute application provides any type of analysis of data stored KDDart which is accessed via mature API referred to as the Data Access Layer. KDCompute executes any analytical procedure, including basic breeding program calculations and mixed model data analysis (Standard Trial Analysis (METAR)).
Processing pipelines cater for the analysis of very large datasets, in the order of many millions of records. These operations occur on the 'server' which is remote from the analyst's workstation. This causes the least inconvenience to the user, especially with long running processes. For the needs of a small breeding program, the role of 'server' can easily be performed on a laptop computer storing a complete KDDart system.
KDCompute is able to manage both simpler breeding applications along with extended analytics capabilities. Complex pipelines have been implemented for GWAS and Genomic Selection applications that include selectable algorithms for imputation, model building and visualisation.
Key to solid analysis is the stable KDDart data platform managed by the API which ensures data integrity and that analysis is conducted dirctly on current, central and reliable data.
This help is intended to provide an introduction to using the KDCompute platform. Any algorithms shown are for demonstration purposes to illustrate how an 'Analyst User' can operate the software. Any specific help for an algorithm should available within the algorithm instructions.

Login and Groups
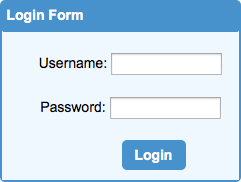
KDCompute - The Login Window
In your web browser navigate to your KDDart installation (e.g. http://kdc.yourdomainname:3000 ) to display the login window as illustrated.
To commence using KDCompute first login/authenticate with a valid KDDart userid and password.
Groups
Note: The Group setting is only applicable to using the KDDart database.
Once logged in the following Switch Group window will display if the user belongs to multiple groups:
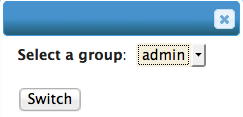
KDCompute - Switch Group Window
Select the Group to use for the session.
If the user is assigned to a single group KDCompute will automatically set the group without prompting.
When logged in the KDCompute Home page will display the currently assigned userid and group as shown in the following illustration.

KDCompute - Switch KDDart Group
A KDDart user with multiple groups, may switch groups without logging out of KDCompute.
Note: In the KDDart environment a 'Group' determines record access. A user's ability to read, update or add records is determined by the user's group setting at the time KDCompute or the algorithm executes.
Logout
Once finished in KDCompute select the Logout link on the main menu to log out of the database.
Note: Logging out from KDCompute will not disrupt any jobs you have running or scheduled.
The Home Window
After login, the Home window is displayed with the following menu options available:
- Home - The main window that appears after login
- File Manager - The window to manage your files and directories on the web server
- Analytical Tools - The window to choose and execute algorithms
- Development Tools - Tools to assist developers create or maintain algorithms
- Logout - Select when finished using KDCompute to log out of he database
The Home window displays a list of your jobs, their current status and a Job Panel for further information as shown in the following illustration.
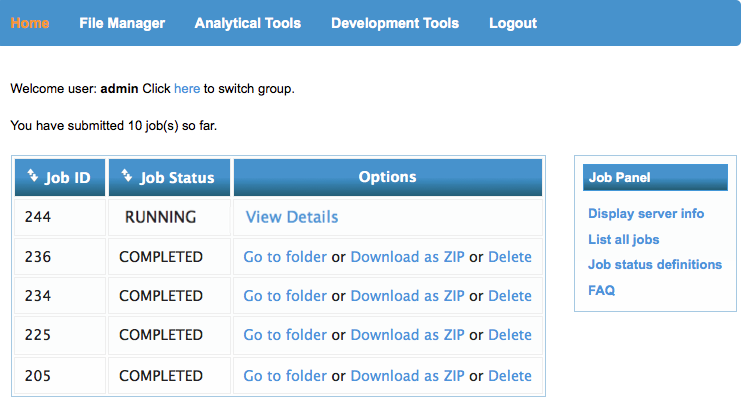
KDCompute - Home Page
The job list shows the executed, running or scheduled jobs for the current user. The order of the display can be sorted on Job ID or Job Status by selecting the column headings. The example above shows the logged in user has one job running and the remainder completed.
Folders are used to store job records (for more information on folders see: Job Folders and Contents).
A folder may be:
- selected for viewing (Go to folder);
- downloaded as a Zip file; or
- deleted when no longer required.
It is advisable, especially when dealing with large data files, to use the Download as a Zip option which will compress (ie Zip) all the output files for the selected job into a single zip file, ready for downloading.
Please note: a timeout will occur if the zip process takes longer than thirty minutes. This may occur for extremely large files.
The Job Panel
The Job Panel, towards the right of the Home window (see illustration above), has the following options:
- Display Server Info - Indicates the current state of the Queueing Server
- List all Jobs - To show all jobs being processed by the Queueing Server
- Job status definitions - Describes the Job Status's returned from the Queueing Server
- FAQ - Answers some general questions about job execution.
Display Server Info
Server info displays:
- The server's current state
- The number of virtual processors per node
- The amount of physical memory on the server
- The number of CPU's allocated.
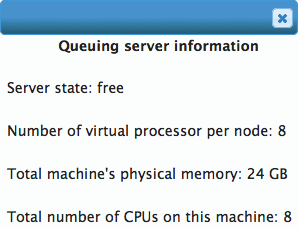
KDCompute - Queueing Server Information
List All Jobs
Selecting 'List all jobs' will display the jobs for all users currently operational on the Queueing Server. The following illustration shows two running jobs.
Note: The 'Running Time' display in not necessarily a true representation of the actual time.
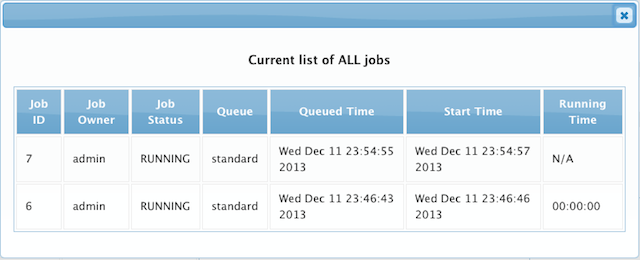
KDCompute - List All Jobs
Job Status Definitions
This is a static display of definitions for the various job statuses the Queueing Server can display. A few of these are unlikely to occur (their documentation from Torque, producer of the Queueing Server, is vague for these items).
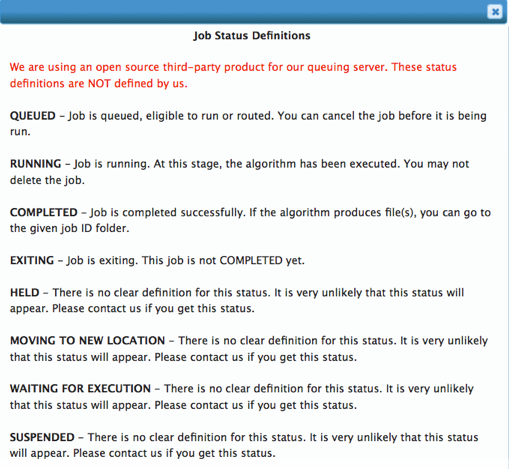
KDCompute - Job Status Definitions
Job Folders and Contents
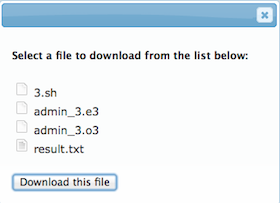
To view/download a job's output select the Go to Folder link adjacent to the job of interest. This will display a folder containing that job's output as shown in the following example.
KDCompute - Job Folder containing
the output of a job
Notes:
- The example illustrated is not necessarily a typical representation of output. The quantity of output files and their content is specific to the algorithm being executed.
- Job output may also be located by navigating to the job's output folder using the File Manager.
The files displayed in the illustration above are the results of a job execution.
In this example the files are:
- 3.sh
- - A Bash script file used by the Query Server to execute the algorithm (which is generated and provided by the 'Technical User')
- admin_3.e3
- - A standard error file - if errors occurred this may help with debugging
- admin_3.o3
- - A standard output file - if the algorithm produces 'standard output' it will appear here
- result.txt
- - A result file produced by the algorithm.
Output files can be downloaded and managed using the 'File Manager' which is described in the following topic.
File Manager
The File manager provides operations to manage user files on the webserver. The webserver is where the KDCompute application is hosted (i.e. lives) and performs the algorithms by users. Any files, input or output, required by an algorithm must be located on the webserver to allow the algorithm to operate.
Operations available with the File Manager are:
- Upload
- - Copy files from your workstation to the webserver
- Download
- - Copy files from the webserver to your workstation
- Copy/Paste
- - Copy either a folder or file from one location to allow pasting to another location
- Rename
- - Either a folder or file can be renamed
- Delete
- - Files and folders can be deleted, excluding system folders.
Output generated by a KDCompute algorithm is stored within subfolders of the submitted_jobs folder. When a job has completed any output files can be downloaded to your local workstation.
The following illustration provides a view of the File Manager. In this example the 'home' folder has been selected to expand sub folders and within those the '206' folder in 'submitted_jobs' is selected and the file contents displayed.
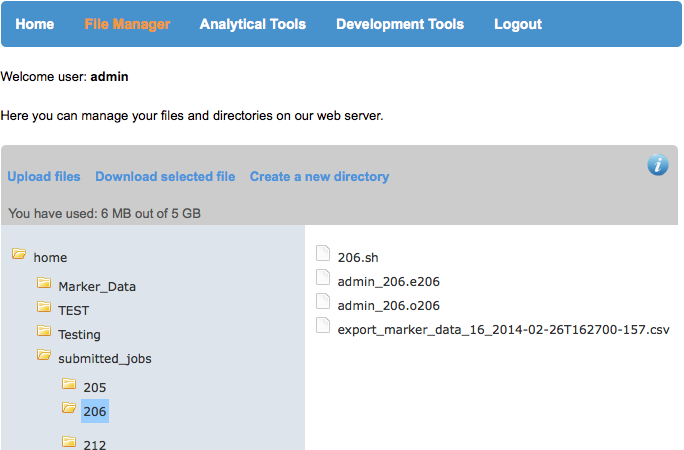
KDCompute - File Manager example with an open completed job folder
The actions that are available also appear in the secondary menu are:
- Upload files
- Download selected file
- Create a new directory.
To Upload Files select the 'Upload Files' link. Then choose your file(s) from the file browser and proceed as instructed.
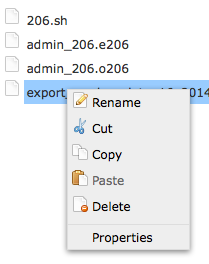
KDCompute - File Manager
'Right Click' Menu for the selected file
which also works for a select folder
An alternative option is the 'right click' menu which is available when a file or folder is selected as illustrated in the adjacent example.
Upload File(s)
Files needed by an algorithm must first be uploaded to the server for processing. The following steps outline how to upload a file in KDCompute:
| Step |
Action/Description |
| 1 |
Select File Manager from the menu. |
| 2 |
The folder to contain the uploaded file can either be chosen by navigating to the required folder and selecting the folder or
by choosing the folder within the upload window when it is displayed next.
Select Upload File from the menu.
|
| 3 |
At the file upload window select the destination directory/folder, if not already selected in step 2, then using the browse button locate and select the file on your computer/network/device to upload.
The chosen file name will be displayed near the 'browse button'. |
| 4 |
When multiple files are to be uploaded select the Add another file link and repeat step 3, browsing for and selecting the appropriate file(s). |
| 5 |
When the required files are specified the application will upload and a status message will confirm the successful upload. |
Note: Whilst one of your jobs is running or scheduled, files cannot be uploaded.
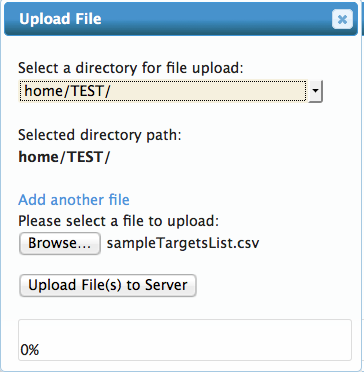
KDCompute - Upload Files
Download File
Output files produced by an algorithm can be downloaded from the server to your workstation when the job has completed.
The following steps outline how to download a file in KDCompute:
| Step |
Action/Description |
| 1 |
Select File Manager from the menu. |
| 2 |
Navigate to the submitted_jobs folder then locate the appropriate job number folder.
|
| 3 |
Select/highlight the file then select the Download selected file link. |
| 4 |
Repeat for each required file produced by the job. |
Note: Whilst one of your jobs is running or scheduled, files cannot be downloaded.
Delete Files or Folders
Files and folders may be deleted from the KDCompute web server when no longer needed.
Note: There is no undelete available and system folders cannot be deleted.
Also the delete operation will not work whilst a job is running or queued to run.
To delete a file or folder:
| Step |
Action/Description |
| 1 |
Select File Manager then navigate to the required folder location then select the file/folder for deletion. |
| 2 |
Right click the and select Delete from the popup menu item.
A Delete Confirmation will be displayed before the file/folder is removed. Confirm to perform the deletion or cancel to stop the operation. |
Algorithms
Algorithms within KDCompute are essentially 'programs' written to undertake specific tasks, such as data analysis, data conversion and manipulation and data upload/download.
Tasks of this nature are potentially long running and process intensive, especially when dealing with large data sets. This is the processing role KDCompute is designed to cater for.
A 'Technical User' develops algorithms as user needs require to perform specified tasks. KDCompute provides an umbrella environment to control, execute and manage these algorithms for multiple users accessing the same KDDart repository.
This section is directed to the 'Analyst User' who is the consumer, not creator, of algorithms and describes how to process algorithms.
Additional guidance for creating algorithms is provided separately for the 'Technical User'.
Note: The help provided here is generic and highlights some of the possibilites with algorithms. Any specific help required for an algorithm needs to be produced by 'Technical User' creating the algorithm.
The Algorithm Window
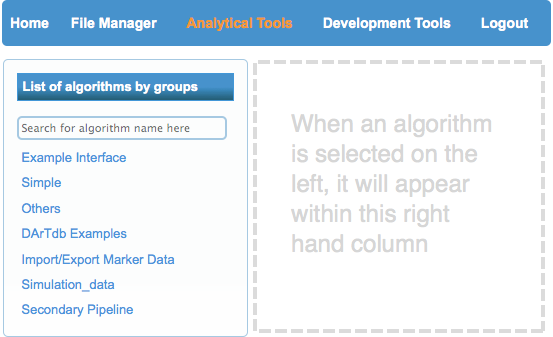
KDCompute - The Analytical Tools window
Select the Analytical Tools link which will display an algorithm window similar to the illustration.
In this example the algorithm list displays the algorithm groups under which the algorithms are placed. When a group is selected the display expands to show the available algorithms.
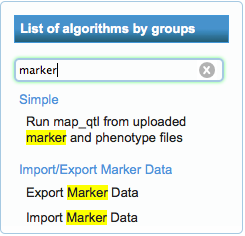
KDCompute - Algorithm search result
Entering the name, or partial name, in the search field will display algorithms which match the criteria, irrespective of their group.
In the adjacent example the text 'marker' has been entered in the search field and those matching algorithms are displayed below. Two are with in the Import/Export Marker Data group and one within the Simple group. The algorithms may be selected and they will display to the right of the list.
Preparation
Depending upon the algorithm requirements some preliminary tasks may need to be performed before the algorithm is executed. Some of these tasks may simply be the completion of the input form.
Algorithms may require data file(s) to be loaded for processing. For example if the algorithm requires input files, such as a file for upload to KDDart, the files must first be uploaded to the web server using the File Manager (see Upload File(s)).
Once any dependencies have been met the algorithm can be submitted for processing.
Simple Example Algorithm
The following example shows a simple algorithm. The 'simplicity' is within the options for algorithm construction, however it serves purpose of introducing the algorithm window.
The display shows details about the algorithm, any help text, version, author and date.
Below the descriptive information are any input fields to enter data, select files and provide any necessary information that has been programmed to enable processing.
The submit button will execute the algorithm if all validation is passed (eg all mandatory fields are completed). Once submitted the job will be scheduled, then executed. Scheduling and any delay is dependent upon activity on the KDCompute server.
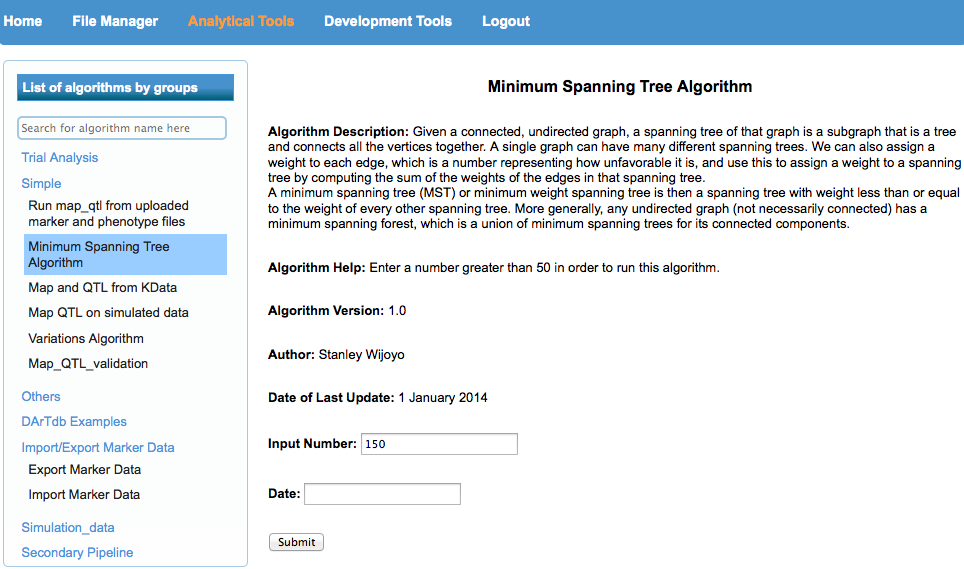
KDCompute - A simple algorithm example
Example Import Marker Data
For this example the 'Import Marker Data' algorithm has been selected and the input fields are displayed. (Note: The window image has been cropped for brevity.)
Depending upon the detail provided by the constructor of the algorithm, a description of the algorithm and any advisory messages will be displayed abov the input fields.
The example show fields requiring entry or selection, such as the 'Marker Data Management Id' drop down list.
The 'Select a File' button allows an input file to be selected from the KDCompute web server. Beforehand the 'Marker Data File' must have been uploaded to the KDCompute server.
If provided, tool tips will display when the mouse cursor is hovered over a field.

KDCompute - Import Marker algorithm example
(Image compressed for illustration)
Once all required fields are completed select the Submit button to schedule the job for processing.
A message will display to indicate successful submission of the algorithm.
When submission is unsuccessful due to errors, e.g. omitted fields etc., messages will appear at the offending fields.
Example Export Marker Data
The 'Export Marker Data' algorithm has been selected in the next example.
Please Note: This algorithm is shown to illustrate a more complex interface. It is not intended as the help for Export Marker and also may not be the current interface of the algorithm.
This is an example shows a more complicated 'template' based algorithm which provides the 'technical user' more development options than with 'simple' dynamic forms as shown in the simple algorithm example above.
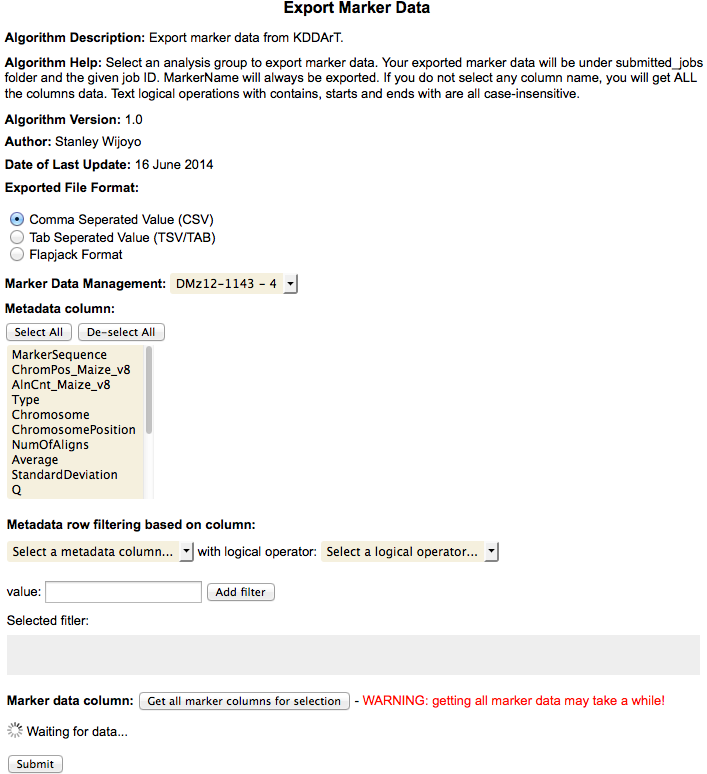
KDCompute - Export Marker Data algorithm example
(Image compressed for illustration)
On the form above the Analysis Group Id has already been selected from the drop down list which causes the Metadata column and the Marker data columns to populate.
To select all columns, for either list box, select the first row in the drop down, scroll to the end and shift select the last entry (note: 'Ctrl A' does not work for select all).

KDCompute - Waiting for data
The waiting for data message appears where the algorithm is waiting for the user to make a selection.
Once all selections and input is complete select the submit button schedule the job for processing.
Filter Construction
When available filtering options allow data to be limited to specific fields (ie columns) of data.
This example illustrates filtering at 'Metadata row filtering based on column:' in the algorithm shown above.
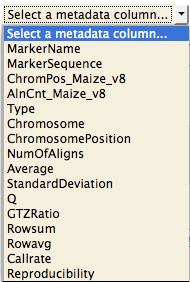
KDCompute - Select Metadata Column
At the 'Select a Metadata column' a single column may be selected to use with the first filter argument.
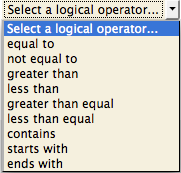
KDCompute - Select
Logical Operator
The next field to select is the logical operator.
Once selected a value needs to be entered then select the Add filter button.
This will complete the first filter which is illustrated next.
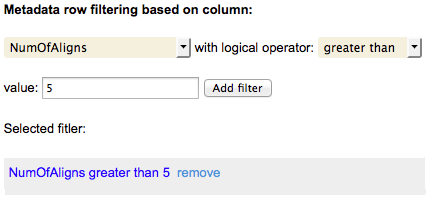
KDCompute - The metadata row filtering
with a single filter added
Filters appear in the greyed area below the 'Selected Filter' heading.
Further filters can be added and removed as needed, by selecting the 'remove' link adjacent to the filter.
Note: In this version of KDCompute notification will not be provided beforehand if you have selected Metadata columns that are unavailable.
They will not appear in the output file. Therefore it is better to select all Metadata columns for exporting and if needed discard those columns that are not required in the ensuing file (e.g. using Excel).
Running KDCompute in the Virtual Machine
KDCompute is available using a pre-installed and configured Virtual Machine (VM). The following instructions are provided to help you get started.
Note: In the following examples substitute
yourdomainname with the appropriate domain name for your installation of KDDart (eg diversityarrys.com, seedsofdiscovery.org, etc).
Starting the Virtual Machine
On The VM computer:
| Step |
Action/Description |
| 1 |
Start the Virtual Machine server and login (see instructions for login/password supplied with the VM) |
| 2 |
Start the terminal application |
| 3 |
Check the VM's IP address by entering the following command (you will be prompted for the password): sudo ifconfig
|
| 4 |
Note down the IP address of the virtual machine |
| 5 |
In the terminal change directory and enter the command to start the VM server as follows:cd KDCompute; perl -w bin/app.pl
|
| 6 |
Leave this application running. |
Preparing Your Local Client Computer
Each time the VM is restarted or moved to another host computer the 'client' computer, which is to access the VM, must have the following change made to that machine's hosts file.
The following steps describe how to change the hosts file:
| Step |
Action/Description |
| 1 |
Edit the hosts file (/etc/hosts) located on the client computer and add a hostname.
This is the IPAddress of the VM machine which you retrieved above.
For example:# A comment may be added in the hosts file -
# Next entry is for the KDCompute VM
127.0.0.1 kdc.yourdomainname
Or
# Next entry is for the KDCompute VM
127.0.0.1 kdc.seedsofdiscovery.org
|
| 2 |
The following messages will appear indicating the server is running successfully:>> Dancer 1.3118 server 5399 listening on http://0.0.0.0:3000
== Entering the development dance floor ...
|
| 3 |
From the browser on the client computer and enter the following URL:
http://kdc.yourdomainname:3000 |
KDCompute requires a connection to the Data Access Layer (DAL).
The DAL base path can be changed in environment/development.yml.
Replace http://kdc.yourdomainname/dal with your DAL URL.
An online server is http://kdc.yourdomainname/dal to test it.
© 2014 Copyright Diversity Arrays Technology Pty. Ltd. All rights reserved